我们在配置Linux VPS、服务器环境的时候,如果这台服务器就我们一个人使用,基本上是不配置FTP管理的,可以直接用SFTP进行管理文件,或者我们可以直接在有些一键WEB脚本中自带安装Pureftpd进行创建特定目录和站点的FTP用户管理。当然,如果有用到可视化面板服务器管理的时候,基本上都也自带FTP软件可以安装匹配不同站点不同用户管理。
有些时候,我们的服务器仅仅用来文件管理或者软件用途的,并没有WEB环境。那如果我们需要对文件管理、传输等用途,可以单独给服务器安装vsftpd来实现用户FTP文件管理。在这篇文章中,笔者将从网上整理到且亲自体验看看如何在Debian系统中安装vsftpd且配置特定目录用指定的用户名和密码去访问。
第一、功能要求
1、需要在/home/laobuluo.com目录中用用户名laobuluo,密码laobuluo.com来访问目录,可以实现可读写、可修改、删除的权限功能。
2、这里我是在Debian 9系统中测试记录的。
第二、配置防火墙开启21端口
如果我们当前Debian服务器没有配置防火墙,正规定义是需要开启防火墙,以及FTP需要用到21端口。我们需要从防火墙中设定开启。
1、查看是否安装防火墙
whereis iptables
然后我们可以看到:
iptables: /sbin/iptables /usr/share/iptables /usr/share/man/man8/iptables.8.gz
这个表示已经安装,如果没有安装,我们需要通过 apt install iptables 进行安装。
2、添加规则
/etc/iptables.default.rules
在这个文件中添加规则。
###########################################################
*filter
# Allows all loopback (lo0) traffic and drop all traffic to 127/8 that doesn't use lo0
-A INPUT -i lo -j ACCEPT
# Accepts all established inbound connections
-A INPUT -m state --state ESTABLISHED,RELATED -j ACCEPT
# Allows all outbound traffic
# You could modify this to only allow certain traffic
-A OUTPUT -j ACCEPT
# Allows HTTP and MySQL and FTP connections from anywhere (the normal ports for websites)
-A INPUT -p tcp --dport 80 -j ACCEPT
-A INPUT -p tcp --dport 3306 -j ACCEPT
-A INPUT -p tcp --dport 21 -j ACCEPT
-A INPUT -p tcp --dport 9000:9045 -j ACCEPT
# Allows SSH connections for script kiddies
# THE -dport NUMBER IS THE SAME ONE YOU SET UP IN THE SSHD_CONFIG FILE
-A INPUT -p tcp -m state --state NEW --dport 22 -j ACCEPT
# Now you should read up on iptables rules and consider whether ssh access
# for everyone is really desired. Most likely you will only allow access from certain IPs.
# Allow ping
-A INPUT -p icmp -m icmp --icmp-type 8 -j ACCEPT
# log iptables denied calls (access via 'dmesg' command)
-A INPUT -m limit --limit 5/min -j LOG --log-prefix "iptables denied: " --log-level 7
# Reject all other inbound - default deny unless explicitly allowed policy:
-A INPUT -j REJECT
-A FORWARD -j REJECT
COMMIT
############################################################
备注:21是指FTP默认端口、80是指web服务器端口、3306是指MySQL数据库链接端口、22是指SSH远程管理端口、9000到9045是FTP被动模式端口范围。
3、生效激活
iptables-restore < /etc/iptables.default.rules
4、设置开机启动
/etc/network/if-pre-up.d/iptables
在文件中添加:
##########################################################
#!/bin/bash
/sbin/iptables-restore </etc/iptables.default.rules
##########################################################
然后保存退出之后添加执行权限:
chmod +x /etc/network/if-pre-up.d/iptables
第三、安装vsftpd和配置
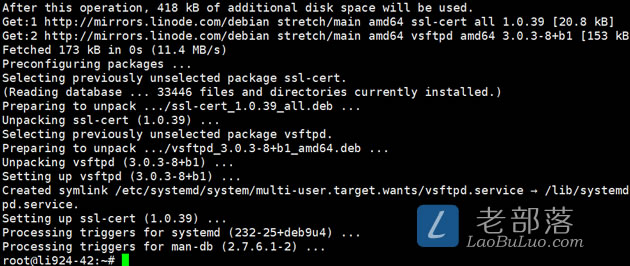
1、安装vsftpd
apt install vsftpd -y
2、配置vsftpd
cp /etc/vsftpd.conf /etc/vsftpd.confbak
先进行备份一份配置文件,要不以后修改错了还可以恢复。
/etc/vsftpd.conf
需要对这个文件进行修改配置,我们可以直接在线修改或者是下载到本地修改。
use_localtime=YES
listen_port=21
anonymous_enable=NO
local_enable=YES
write_enable=YES
local_umask=022
anon_upload_enable=NO
anon_mkdir_write_enable=NO
dirmessage_enable=YES
xferlog_enable=YES
connect_from_port_20=YES
chown_uploads=NO
xferlog_file=/var/log/vsftpd.log
xferlog_std_format=YES
async_abor_enable=YES
ascii_upload_enable=YES
ascii_download_enable=YES
ftpd_banner=Welcome to FTP servers
chroot_local_user=YES
pam_service_name=vsftpd
userlist_enable=NO
tcp_wrappers=YES
idle_session_timeout=300
data_connection_timeout=1
把以上几个选项都替换,或者是添加,有的是没有的需要添加。然后我们还需要加上下面的配置。
guest_enable=YES
guest_username=vsftpd
user_config_dir=/etc/vsftpd/vconf
virtual_use_local_privs=YES
pasv_min_port=9000
pasv_max_port=9045
accept_timeout=5
connect_timeout=1
3、创建用户名单
3.1、创建目录
mkdir /etc/vsftpd
3.2、创建用户和密码
/etc/vsftpd/virtusers.txt
创建用户名和密码,第一行是账户,第二行是密码。
3。3、生成虚拟用户信息
apt-get install db4.8-util
db4数据库。
db4.8_load -T -t hash -f /etc/vsftpd/virtusers.txt /etc/vsftpd/virtusers.db
生成数据库文件。
chmod 600 /etc/vsftpd/virtusers.db
设定PAM验证文件,并指定对虚拟用户数据库文件进行读取。
cp /etc/pam.d/vsftpd /etc/pam.d/vsftpdbak
备份原有配置文件。
/etc/pam.d/vsftpd
编辑文件:
auth required /lib/security/pam_userdb.so db=/etc/vsftpd/virtusers
account required /lib/security/pam_userdb.so db=/etc/vsftpd/virtusers
这个一定要加到文件头部。并把最后四行#加这个注释掉。

第四、创建用户配置文件
mkdir /etc/vsftpd/vconf
创建目录。
cd /etc/vsftpd/vconf
进入目录创建配置文件。
touch laobuluo
然后,用命令 nano laobuluo 配置文件。
local_root=/home/laobuluo.com
write_enable=YES
anon_world_readable_only=NO
anon_upload_enable=YES
anon_mkdir_write_enable=YES
anon_other_write_enable=YES
如果我们有需要设置多个用户,一样效仿配置。
第五、重启生效
apt-get install chkconfig
chkconfig vsftpd on
/etc/init.d/vsftpd restart
然后我们试试是否可以连接。
本文内容参考至:https://www.osyunwei.com/archives/4539.html。